
Whether it’s on a hat, bag, polo, or jacket, your logo will look more professional when it’s embroidered. And unlike screen printing, we can place an order for as few as one piece at a time. Yet many people still choose screen printing for their company apparel, all because of a little pesky charge called the “digitization fee." What is this so-called “digitization fee” and why do you even need to digitize a logo, especially if you already have a digital copy of your logo? Both are fair questions and probably have popped up if you have ever looked into getting your company logo put on apparel. Regardless of whether this is your first time ordering an embroidered piece, or your four hundredth, we all seem to end up having a question or two. Luckily for you, in today’s blog post we will be answering these as well as a few other helpful insights into the art of embroidery.
From Needle to Machine
—
First things first, a quick history lesson. Before we can begin talking about the complex world of embroidery, we’ll need to catch everyone up to speed. Although sewing machines did not start to see a rise in personal use until the 1950s, the first multi-head embroidery machine was actually invented in 1911. A “head” is actually jargon for the complete sewing machine, excluding the stand or housing. To put it in another way, the head is the complete mechanism that allows the needle and spool to automatically drive the thread. Creating a machine with multiple heads allowed decorators the ability to simultaneously embroider multiple pieces in a single run. This increase in production became a staple in the commercial world of embroidery. Which is why modern machines more resemble these early machines rather than the sewing machine sitting in your basement. The classic one head machine that is generally the first image associated with a sewing machine.

Modern embroidery machines would not be possible without breakthroughs from two different companies in the 1980s.
- Founded in 1979, Wilcom introduced the first graphic design system for embroidery that could be run on a microcomputer
- Founded in 1972, Melco produced the first embroidery sample head and the first digitizing system for embroidery machines.
Now these are both important pioneers, but this blog post is supposed to be a helpful guide, not a boring history lesson so we won’t dwell on them for too long. That being said, it is worth covering as it brings us back to the problem of digitization.
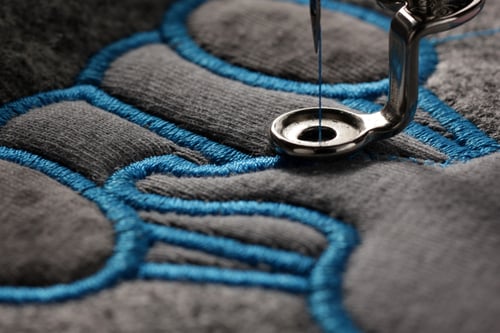
Thanks to the innovations by Melco and Wilcom embroidery machines today are computer operated and thus require the use of digitizing software to plot the path of the needle. This process of “plotting” is an easy way to understand digitizing.
It’s All About the Numbers
—
If you read our blog post on color formats, then you’ll know that colors on a screen are just sequences of numbers that the computer converts into an image. The same is true for a digitized file and an embroidery machine. The digitization process individually maps each stitch as a specific coordinate on a grid, calculating not only the changes in thread colors but also the change in direction from the center point. Even if you happen to have your logo saved as a vector format (.ai, .eps, .pdf, .svg), a designer will still have to recreate your logo in a digitizing software in order to get this information.

An example of what ICC’s logo looks like in one of Wilcom’s digitizing design studios.
This need for logo recreation is why almost every embroidery studio will charge a digitization fee if you do not have one readily available. For this, we always ask our clients if they have an embroidery file of their logo beforehand. It is for this very reason that I always stress the importance of saving a digitized file with the rest of your marketing materials. A helpful tip, as an embroidery file can be used an endless amount of times as long as you do not change the size of the design or the number of stops. A little self-explanatory, a stop is the point in a sequence where the needle pauses or stops, typically associated with a change in thread color. I want to stop and take a second to hammer home the importance of stops as it is a common reason why I see clients having to pay for unnecessary re-digitization. Simply because they do not account for the potential need for thread color changes for future embroideries. To help better explain what I mean, I want to guide your attention to the image below of the actual sequences in the ICC logo embroidery design.

Notice how even though the design has just 2 thread colors, it still has 3 sequences in its programing. By separating the grey half circle run from the “products'' line, I have left myself the ability to change the thread colors of these 2 separate components without having to re-digitize the file. You should always be able to change your thread colors without having to digitize a new file if your logo was digitized properly. I add this clarifier “properly” as I have seen too many companies fall for the classic mistake of digitizing their logos in 1 color with only 1 stitch sequence. Whether it be from lack of knowledge or that they originally got the logo digitized for a piece that only called for 1 color, it is still a costly mistake. We have a client whose logo is made up of a few shades of red resulting in a digitized file with 13 different sequences. However, if one of their employees orders a red shirt then their brand guidelines call for the logo to be all white. By simply changing all of these 13 sequences to the thread color white, we can create the appearance of a 1 color white embroidery. Sadly, just like a square and a rectangle, this simple conversion only works one way. Which is why this preplanning of accounting for multiple colors will become very useful as you reuse your design throughout the years.
Hoop There It Is
—
So, you’ve followed my advice and digitized your art to account for the maximum number of possible thread color changes. Smart cookie, but somethings wrong, the embroidery studio informs you that they are unable to decorate the backpack of your dreams, even though they have embroidered bags for you in the past. What gives? Why won’t your design work? Well, there are a couple reasons why you may find yourself in this scenario and funny enough they all have to do with the concept of size.
Many embroidery machines use plastic or magnetic hoops in order to stabilize the garment during the embroidery process. If a bag or pocket does not have room for a hoop then it cannot be embroidered.
Yes, size matters, and changing the size of your embroidery design is sadly another reason why you may have to pay for an additional digitization fee. As mentioned earlier, the digitized file plots each stitch as a point on a graph. Which is why you cannot change the size without replotting the points. Although the same embroidery file can be used to embroider different pieces like towels, bags, or apparel, the physical space on a garment has to be able to fit the design. For example, say you were getting some embroidered apparel for a golf outing. You start by digitizing the embroidery file for your polos and you want to make sure your brand really pops so you set the design to be 3 ½” W x 2” H or roughly the size of a standard business card. Definitely not too big for a polo but say that you also wanted to get some visors as well. The visor’s front panel is definitely wide enough with a width of 11” but its height is only 1.80”. Scenarios like this are why I also recommend having a small and large digitized version of your logo. Some of my clients even go as far as having alternating tiers of logos changing size both vertically and horizontally.
Wait, What Is A .dst File?
—
I'm going in the weeds a little bit with this but when we ask our clients if they have an embroidery file, it's commonly a .dst file. DST (Data Stitch Tajima) is a very commonly-used embroidery format originally from Tajima. Almost every embroidery machine in the commercial market will read this format making it convenient. If you have a .dst file, this will save you from paying to have your logo digitized again.
Ordering decorated apparel can be tricky, especially when it comes to the world of embroidery. Hopefully this blog has helped clear up some of that confusion. If not, then here are the main takeaways for your review as well as some additional tips.
Main Takeaways
- Once a design is digitized, you can reuse it an unlimited number of times
- Be sure you digitize your logo with all its possible color variations
- Changing thread color should not require an additional digitization
- Changing the size of a logo will require a new digitization file
- If an apparel piece cannot fit in a hoop, it cannot be commercially embroidered
- You’ll need separate digitized files for flat and 3d puff embroidery
- Small details can get lost in embroidery, simple designs are best
- Always get a stitch out of a new design before using it
- .dst is a commonly-used embroidery file format
Regardless of what apparel piece you choose for your marketing needs, you can count on the specialists at ICC to help guide you throughout the purchasing process!
Still in the mood for reading? Check out our blog to read other interesting lists and insights into the business world.

